Blog

Everyone Loves a Ruffle (Cake)!

Everyone loves a ruffle, and that includes ruffle cakes! There is just something about a ruffle that makes an event feel like a real reason to celebrate.  This post is in honor of the ruffle today and I’m ending the post with a tutorial on how you can make your own ruffle cake!  So, let’s get down to the ruffles…

Image via A Blissful Nest

I thought these instructions for DIY Ruffle Cake Pops were pretty great too!  You can learn how to make the fun cake pops shown below, here

Make your own DIY Ruffle Cake Pops with Pint Sized Baker blog! 

See just how festive ruffles can be?  So for your next celebration try this tutorial for you own DIY Ruffle Cake! Jennifer Ashley from Pretty Little Details blog has been kind enough to show us just how it’s done.  It’s totally do-able at home and oh so chic!  Check out how it’s done below. 

Step 1: The first step is to cover your cake with a thin layer of icing to seal in all of the crumbs.  If you have time, it’s ideal to stick the cake in your refrigerator for a half hour or so to help firm up this outside layer.
 
Step 2: Once your crumb coat is finished, you are ready to start piping ruffles. (If you are a perfectionist, you can add one more step at this point and can draw vertical lines spaced 1″ apart in the crumb coat to use as a guide for your ruffles.  I opted to just eyeball it, which ended up causing some of my ruffle rows to be a tad bit uneven but in a cute undone sort of way).
 
Step 3: Get out your icing bag! I used a Wilton no. 102 tip to frost my cake, but any petal tip would do the job. 
Step 4: Starting at the bottom of your first row (thick end of the tip towards the cake) move your icing tip back and forth, stacking the icing to build a vertical column reaching to the top of the cake.

Step 5: Continue the process, creating 1″ inch columns surrounding the entire cake. 

Step 6: How you want to finish the top is up to you!  I decided to continue the ruffle theme and used the same Wilton no. 102 tip for the top of the cake.  Starting from the outside and working in, I worked my way around the cake moving the icing tip back and forth as I spiralled the icing in.

It’s just that easy!  Now the biggest lesson I learned the hard way was this: Don’t try and finish frosting a ruffle cake all in one shot!  As I got half way through piping ruffles, I realized they were becoming more messy and starting to droop.  What was happening, is the icing bag began to warm with the heat of my hands.  Once I realized this, I stuck the icing bag and the cake back in the refrigerator for 5-10 minutes and once again the icing held its shape and created the lovely ruffles I was looking for.

Thanks for sharing this fun ruffle cake tutorial, Jennifer. Stop by Jennifer’s blog, Pretty Little Details to see more of her great party ideas.  


DIY Decor for Your Home!

Hi, my name is Veronica.  I’m a graphic designer, blogger, and overall artist, and I have a great home decor DIY project for you.  When I first moved into my boyfriend’s house, I wanted to help make his house my home with my own unique decorative touches.  Today I will show you how I managed to do just that with a piece of wood, paint and chalk.  Take a look at this great home decor DIY project!

Step one: Buy tools.

 
To get started, you will need a wooden plaque, chalkboard paint, a paint brush or sponge, chalk or pastels and some nice ribbon. If your wooden plaque doesn’t have a hole drilled in it, you can use some screw hooks instead.  You can find all these items at your local craft store.
 
Step two: Prep wood sign.
I recommend getting the Rustoleum chalkboard paint, it goes on smooth and is easy to wipe clean with a damp cloth.  Use a wide paintbrush or a sponge to brush on a layer of paint.  Wait a couple hours before applying a second coat.  After a few more hours, you may begin writing on it.
 
Step three: Create your word.
 
Time to start writing!  For this example I decided to use the words “Come in” and “HELLO”. Start by lightly writing the words on your sign, don’t press too hard, this is just to see how you will arrange them.
 
Once you are satisfied you may go over the lines with more pressure. 
 
 
You should also experiment with different styles, some of you may like thick block letters and some of you may prefer a handwritten style.  I used soft pastel pencils because they are more precise in small areas and come off easier with a damp cloth.
 
For your convenience, I created some printables to help you draw out your greeting.  You can print them out here and use them to transfer the letters to your sign.  To do that you first print them out, turn them over to the back side, rub some chalk onto the paper, place the paper print side up on your sign and go over the letters with a pencil or marker. This should transfer the print onto your sign. 
 
Step four: Decorate.
Also, feel free to add you own hand drawn, decorative elements!  Flowers, squiggles or other creative designs will only add to the beauty of this handmade sign. 

Step five: Display. 

 
You are almost done, all you have to do now is hand it up or display it on a picture stand. I used yellow ribbon and tied it into bows on the front.  And that’s it, hang it on your door and enjoy. 
 
This is a great way to personalize your door when holidays come around!  You can simply erase your old greeting and write “Happy 4th” or “Happy Holidays”.  You can even paint both sides of the plaque and have an interchangeable sign.  It’s great for businesses, too!  You can have one side that reads “Open” and the other “Closed”.  There are many other things you can do with just chalkboard paint and some chalk, so go and explore your possibilities.  I hope you have enjoyed this tutorial!  If you want to learn more about lettering you can join my FREE 5-Day Hand Lettering Course
 
Thank you to Veronica for sharing this awesome DIY project on the blog today!  This is one I will definitely try in my own home.  I’ll also be participating in Veronica’s free hand-lettering course this week.  Hand-lettering is the art of drawing letters and can be used to create all sorts of artwork, so be sure to sign-up if you’re interested.  Happy Friday!
 

Artist Spotlight with Contemporary Abstract Artist, Liza Matthews

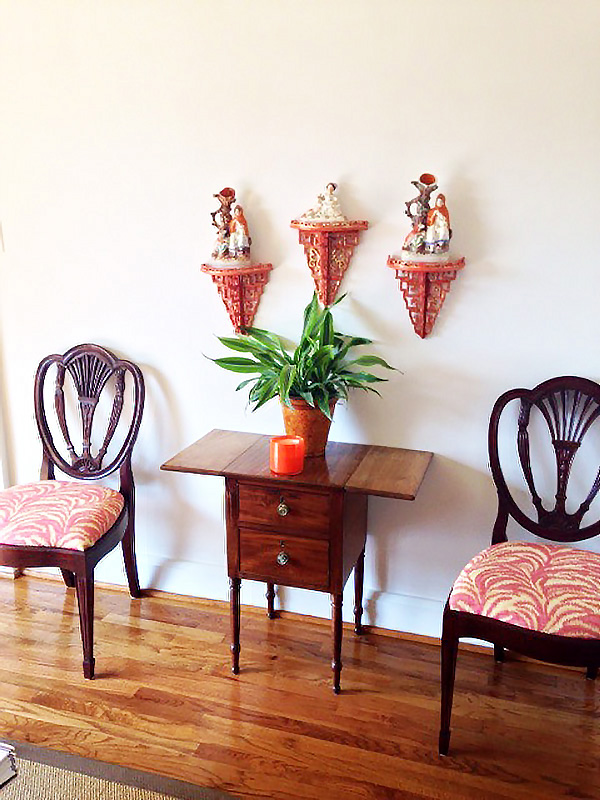
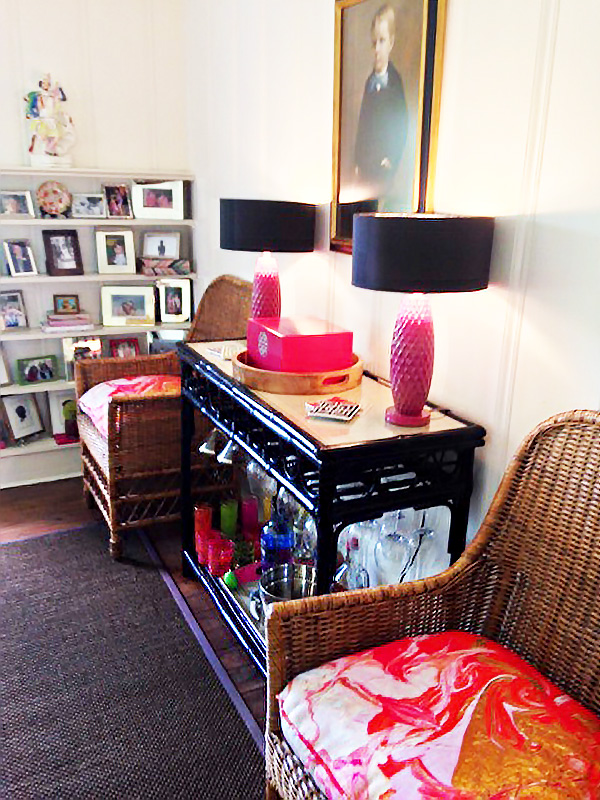
Today I’ve decided to mix-up the Artist Spotlight series with the home tour of an extremely talented artist, Liza Matthews!  Liza is an abstract artist and textile designer based in Baltimore.  I really love Liza’s oil paintings, especially her uniquely abstract landscapes and her Chinoiserie style paintings.  It’s no wonder that Liza has decorated her home with her own dynamic artwork.  I’m pleased to present the artful home and artwork of Liza Matthews.

Painting title “Peacock” by Liza Matthews, Oil, Acrylic and Charcoal 60 x 72 (FOR SALE, contact Liza for pricing)  Featured in the Spring 2015 Washington DC Showhouse (family room) for Iantha Carley Interiors.

Liza on creating art…

I love creating art because it’s a wonderful outlet for me to experiment with color, texture and pattern. You will find all of that in my work and more.  I am constantly inspired by my surroundings, interiors, different landscapes and daily travels.  I look at something and envision it on a canvas.  I have a few different styles that gives me the flexibility to play with different subject matter.  For instance, I enjoy doing landscapes and seascapes but with a very abstract feel.  I also think everyone can relate to a landscape and/or seascape.

Abstract landscapes…

In my abstract landscapes you’ll see a horizon line with possible reflections depicted in the piece.  I also like the use of metallics in my paintings, as it gives the sense of a sparkly cloud, sunset or water glistening.  In this painting (shown above) I created a ‘watercolor’ feel seascape that shows large reflective pools of water.  I love how the colors have come together and mixed to make some unusual shapes and shades of green and blue. 

Liza’s personal style…

I have a very bohemian style.  I love to mix the old with the new.  I have a lot of things that mean a lot to me that I have either collected myself, inherited or was given to me, so I like to put everything together.  I enjoy mixing in my own paintings in my interiors, but I also like to collect art from other artists.

On color and texture…

I also love color and texture, as I think it makes for more interesting interiors.  I have just recently moved into a wonderful house on Lake Roland.  We painted everything in Simply White by Benjamin Moore and it makes everything pop, especially our colorful decor!  I have a lot of color in my furnishings and I am finding the white to be very soothing.   

Liza’s creative inspiration…

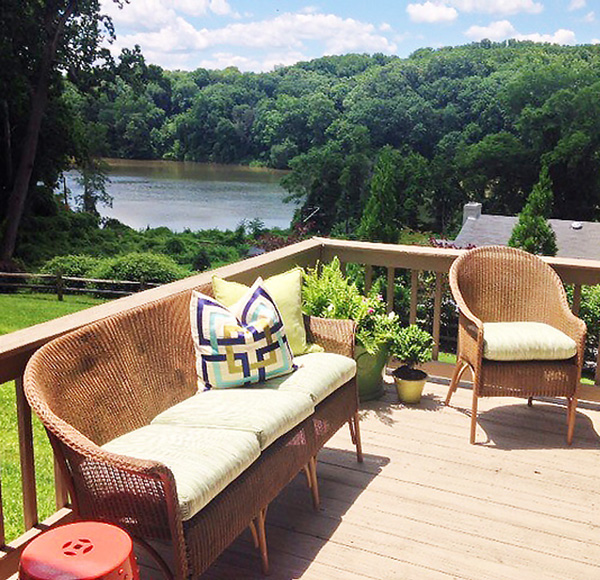
The amazing views at my home is a huge inspiration for my work.  The water here is always changing right along with the weather and seasons.  As a result, my favorite spot at home is absolutely our deck and our patio!  Here are a few photos of what we look at daily.  Just being outside and seeing the water makes me happy!


Adventures in textile…

My painting has led to creating  textiles, which has been very exciting for me.  I’ve had the good fortune to work with Cotton and Quill on fabrics and my second line comes out in April at Highpoint.  My first collection was a ‘marble’ collection and the second is a ‘Chinoiserie’ collection (see above).  Each are offered in cotton, cotton linen, and sateen.  Cotton and Quill have been wonderful to work with and have worked closely with me to ensure the best repeat and color edits for each line of fabric.  

Painting by Liza Matthews, Oil and Charcoal 

Find out more about Liza Matthews and her artwork at her website here.  She offers commissions, as well.  Liza’s fabric collections are for purchase at Cotton and Quill

728x90

Go Bold with Paint Splatter in Design!

Image via Eclectic Trends
 
It’s all about paint splatter in design on the blog today!  The paint splatter motif’s abstract nature makes it a great way to bring an artful touch to your home, which I love of course! When looking to make a bold statement in design, paint splatter home accents really achieve just this.  It’s bold, artistic, unexpected and fresh.  A perfect combination!  I’ve rounded up my favorite paint splatter designs that are executed with style.  Here’s some chic inspiration for your Monday!  
 

Designed by Gerrie Bremermann. Photo Credit: Barbara Elza Hirsch of Chez Elza

Designed by Kelly Wearstler

I love how much drama paint splatter can add to a space. The hallway in Kelly Wearstler’s design above is a great example.  The small powder room below makes a huge statement as well with paint spatter-style wallpaper.

 
Wall art by artist Rowena Martinich

If you don’t want to take the plunge of paint splatter wallpaper, you can try selecting your favorite fine art painting that evokes a paint splatter feel.  Australia-based artist Rowena Martinich painted the colorful artwork (above) and has many other fine art creations for sale on her website here

Designer Pat Healing, Maura McEvoy Photography, House Beautiful
 
So basically, paint splatter in design is pretty cool!  If you’d like to try paint splatter wallpaper, check out this option.  Also, here are two great resources for adding a chic paint-splatter vase to your home.  On the left you’ll find an awesome DIY paint-splatter vase project from Little Green Notebook blog, which you can customize in your own colors!  On the right you’ll find Jonathan Adler‘s luxe black and gold paint splatter vase, which is an eye-catcher with a hint of drama. Take a look! 


Tips for Entertaining with Style (and with kids!)

London Interior Designer and Mom, Karolina Barnes has joined us today to share her lovely backyard BBQ along with her TOP 5 TIPS for entertaining in style… and with kids!  As a mom she’s mastered juggling hosting preparations with looking after the children, all with ease and grace.  Not to mention, she’s a designer too so her backyard BBQ is both stylish and infused with vibrant colors!  Karolina’s tips aren’t just for those of you with children though, but really for everyone.  Take a look at this family-friendly BBQ filled with loads of English-charm and plenty of color, hosted by Karolina Barnes of London. 

1. Approach your outdoor decor in a same way as your indoor. 

This means starting with a colour scheme of at least 4 core colours and working around them. In my case I started with the outdoor Ikea rug which added fuchsia pink and yellow. I also included green and blue décor as accents.  I managed to pull those colours together through the cushions on the seats and dinner plates.
2. Use textures and bold patterns.
 
I like using colours, textures and patterns to inject some personality into the space.  Bold colours in particular go really well against the greenery in your garden. 
 
Mixing patterns such as stripes, chevron and ikat (on my cushions) also makes the space more vibrant and individual.  I purposely didn’t want to create a matchy-matchy feel so I used different cushions on each chair but in the initial colour palette I started with.  
 
3. Use layers in table dressing.
 
If you have kids around, keep your table setting to its minimum. I like to start my table with a white table cloth since it provides a nice clean, elegant backdrop which is very easy to build upon.  Use flower pots and urns as a centre piece.  It will be a very nice touch.  Also, if your kids are old enough, get them involved in your preparations and special event.  They can help prepare the food, set the table, or even just pose for great family photos!
Think practically. In my case, instead of placemats, I used table runners which I layered over one another in crosses. To make my table more interesting, I used two different types of the table runner.  One was plain blue in glazed linen running through the centre of the table, and the other two were in bolder green cotton with fuchsia pink dots running vertically on either side of the table.  A lovely way to spice up your dining table! 
 
4. Invest in quality outdoor furniture.
 
I would recommend investing in the best quality outdoor furniture you can afford (see above).  Teak, eucalyptus and other hardwood can withstand harsh weather conditions throughout the year.  Teak in particular is very durable and hard-wearing.  Teak’s initial honey colour gradually changes to light silver grey, which has absolutely no effect on the longevity of the furniture.  If you prefer keeping it in the nice honey colour, use teak sealer to revive it once in a while.

5. Forget about perfection and just enjoy it!

 
Entertaining with kids is not always easy. Especially when you have to be the host, while manning the kitchen or BBQ grill and looking after the kids at the same time.  It can get very stressful. But my advice is, don’t try to make things perfect.  As long as the food is good and everybody is having a good time, you can give yourself a pat on the back.  
 
As a bonus, Karolina has shared her daughter’s recipe for Strawberry Meringue Nest, which she served at her recent BBQ.  I’ve included her delicious yet simple recipe below. To learn more about Karolina or to check out her UK-based interior design services, please stop by her website here.  Happy Friday!
 
Strawberry meringue nest with cream  – super easy summer dessert!
Ingredients:
  • Ready prepared
    meringues (similar to these or make your own)
  • Fresh strawberries
  • Whipping cream
  • Superfine (caster) sugar – (You can simply blend regular sugar to make superfine sugar.)
  • Fresh mint leaves
First gently cook your cut strawberries with one table spoon of caster sugar and one spoon of water until you have a nice thick sauce with soft strawberries pieces running through it.
 
After it cools down, whip the cream with a third of the strawberry sauce so that it’s nice and light pink. Spoon the whipped cream on the meringue nest and decorate it with the remaining strawberry sauce and a mint leaf.  Voilà! 


Create a perfectly stylish space for your little prince or princess.Shop Belle & June Baby And Child.

Fashion meets Design: with Fashion Blogger Jennifer Berke

Hi y’all! I’m Jennifer, a web designer for boutique stores and the fashion and inspiration blogger behind Joie Girl. I’m from Austin, Texas, where the graffiti encourages people to eat more kale and queso is a part of every meal, including breakfast. I developed my passion for blogging while I worked at Camille Styles and Austin Monthly. Joie Girl is my creative outlet where I celebrate the joys of fashion, food and life. Fashion and style bring me joy, and I love to share that joy with others. I am so excited to partner with Jacquin for my first post about interior design! 

My personal style is feminine and classic. I love to stick with chic basics, but on days when I dress up I love a look that is glamorous and a little modern. I love this room because of the rich colors and glamorous feel. Turquoise blue and grey is one of my favorite color combinations, so I felt really drawn to the chairs and the rug. I particularly love the luxe feel of the chandelier and the sheepskin covered chair, and the bright pops of green and yellow bring life and light to the room.
 

The combination of rich and bright colors in this room inspired me to wear this jumpsuit- the turquoise and green stripes mixed with green, pink and yellow stripes make this a colorful and fun look to go out in! The stripes in the jumpsuit mirror the modern, geometric lines of the room, but the wide leg silhouette makes it feel just as 1970s glam and bohemian. 

I styled the jumpsuit with a white Clare V. clutch and wedge sandals. I kept the accessories to a minimum because this jumpsuit needs no embellishment- it speaks for itself! I have been obsessed with wearing jumpsuits lately- there is nothing easier or more chic to wear in the summertime! You can see more ideas on how to wear the jumpsuit trend on my blog, here and here!  For more of Jennifer’s looks visit her on Instagram and Twitter


Celebrity Fashion Designers at Home – Home Tours

I love taking a look behind the scenes to see how our favorite celebrity designers live and decorate their homes. Today I have three fab homes for you that are sure to inspire!  We’re touring the homes of fashion designers Trina Turk, Tracy Reese, and Lela Rose. 

Palm Springs, CA home of fashion designer Trina Turk, Justin Coit Photography, MyDomaine

We’ll begin with the bright and creative mid-century designed home of Trina Turk.  Trina’s Palm Springs home is California cool with a mod, vintage vibe.  I am really loving all of her funky and artistic elements!  I would definitely say that Trina’s home is a reflection of her fashion taste, which is all about the use of whimsical bright colors, but with sophistication.  As you know, I am a lover of color as well, so I have always been drawn to Trina Turk’s fashion designs, but her home design is fantastic as well!

Palm Springs, CA home of fashion designer Trina Turk, Justin Coit Photography, MyDomaine

Palm Springs, CA home of fashion designer Trina Turk, Justin Coit Photography, MyDomaine
Tracy Reese’s upstate New York family getaway, Country Living

Tracy Reese is another one of my favorite designers so I am excited to bring you a taste of both her Manhattan home and her country vacataion home.  With the hustle and bustle of NYC, it’s no wonder why Tracy created a New York state country escape to enjoy with her family.  Her getaway home is the epitome of casual comfort done with style.  The wicker chairs and vintage flair really add to the charm of this lovely vacation cottage. 

Tracy Reese’s upstate New York family getaway, Country Living

Tracy’s sheepskin rug and warm pink walls really creates a cozy feel in this living room.  If you’d like to add these elements to your home, you can find a similar sheepskin rug here or here, and the warm pink color on Tracy’s living room walls is Benjamin Moore’s Peach Kiss

Tracy Reese’s upstate New York family getaway, Country Living

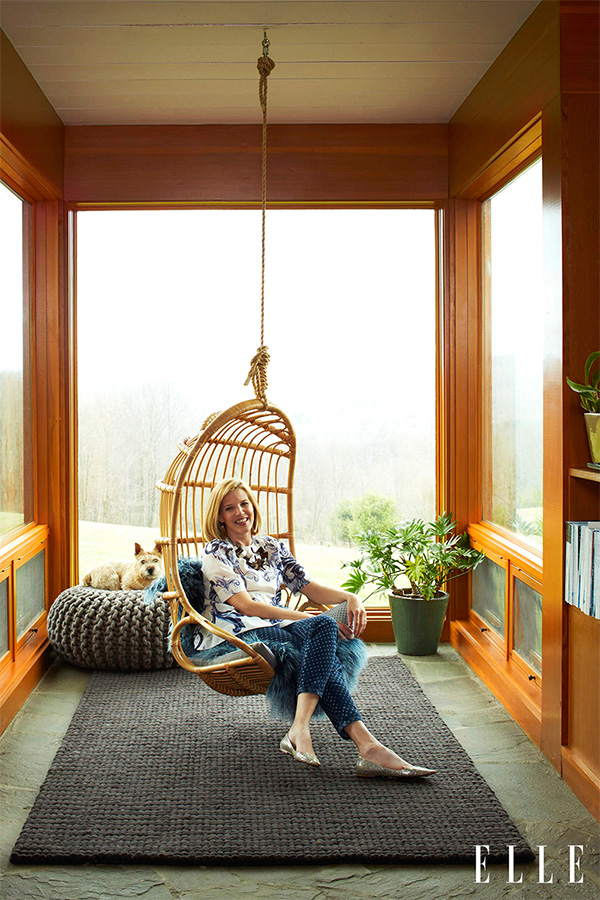
Our last photo (below) featuring Tracy Reese shows Tracy at her Manhattan home in a lovely Chinoiserie styled living room. I love that Chinoiserie styled spaces have been popping up so much!  She even utilizes Griffin & Wong‘s handpainted Chinoiserie wallpaper, which I mentioned in my recent post.  If you want to learn more about Chinoiserie then check out my post titled Bring Chinoiserie Style to Your Home!  Tracy’s home is styled elegantly, just like her beautiful fashion designs for the modern woman.

Tracy Reese in her Manhattan home, Elle Decor
 
Lela Rose’s Manhattan home, Elle Decor

Last up of our fashion designers, but certainly not least, is the creative Lela Rose whose stunning wedding designs are perfect for the classic beauty.  Her Ready to Wear collections are also quite stunning! I’m especially excited about her 2016 Resort Wear collection right now.  There is a real depth and richness to this collection that is equally present in Lela’s home design.  I also hear that Lela’s home houses a tequila room, which I must say is pretty cool too. Let’s explore.  

Lela Rose’s Manhattan home, Elle Decor

I really love the rich wood tones Lela uses in her Manhattan home.  There is a global sophistication to these spaces that is both unique and inviting.  See above and below.   

Lela Rose’s Manhattan home, Elle Decor
Lela Rose’s retreat in New York’s Catskills, Elle Decor
Lela Rose’s retreat in New York’s Catskills, Elle Decor
 
Which of these celebrity home tours are you loving the most?  Have a great week!


Beauty and the Binky

Happy 4th of July!!  I have two bonus posts in store this weekend in honor of the holiday.  I’m starting the weekend with a baby themed post featuring my sister Melanie’s baby shower AND a baby-themed edition of “Bloggers at Home featuring mom-blogger Jaclyn Kent of Beauty and the Binky

My sister Melanie’s baby shower was such a fun celebration!  It was hosted in my hometown of Chicago on the rooftop of fantastic restaurant, Epic, located downtown. The afternoon was made complete with sunny weather, just for my sister’s special day!  If you know Chicago, then you know the weather is very unpredictable, so real summer weather was quite the treat.  We can’t wait to meet baby Sophie!  Congratulations to Melanie and Shane!! And keeping with the baby trend, now for a baby-themed edition of “Bloggers at Home”!
 
Jacquin: Thanks for giving me a peek inside of your family friendly home!  I’m excited to see how you’ve decorated your son’s nursery and playroom.  Please introduce yourself and your blog.
 
Jaclyn: Hello! I’m Jaclyn from Beauty and the Binky. I’m a young, fashionable mom.  I never cook, but I do get dressed every day.  I wrote the book on night wakings, I graduated from the University of Pumping at Work, and I built a 30 pound child with my breasts alone. …all while wearing a pencil skirt and heels.  I admit that I’m not “good” at anything, I just try really hard. I believe a little effort goes a long way. We just bought our first house and we’ve been working to make it a home! Please come inside!
 
Jacquin: How would you describe your personal style?
 
Jaclyn: My personal style is a mix between comfort and classic, chic pieces. I think comfort is really important (especially for a young mom), but I like to add the perfect accessories to take an outfit to the next level.
 

Jaclyn’s adorable nursery design…

Jacquin: What is your favorite thing about blogging?
 
Jaclyn: My favorite thing about blogging is the community that I have been so graciously welcomed into!  I imagined blogging as a one-sided hobby, where I blab out to the great abyss and get no response.  Instead, I was lovingly attacked with support and advice!  Building blogging friendships has been my all-time favorite part of blogging.  I’ve actually met a few bloggers that I followed before I even blogged and I’ll be meeting more blog besties in September!
 
Jacquin: What’s your favorite family activity?
 
Jaclyn: Our favorite family activity is to go for an evening walk or take a bath. I know these are pretty tame activities and may sound boring, but we really cherish our calm moments together. My husband and I are both very excitable people, so finding a peaceful moment is really special to us.
 
Jacquin: How do you like to unwind from busy day-to-day life and mom duties?
 
Jaclyn: I like to unwind by enjoying my hobbies of blogging and reading. I have to be honest, I don’t have any “mom” duties, we just have family duties! My husband usually gets our son settled and starts dinner, while I spend time blogging and unwinding. We all eat dinner together, read stories with our son, and then put him to sleep together.  I think our evening routine is a good way to unwind, too! 
 
A Playroom for Owen…
Stop by Beauty and the Binky blog and say hello to Jaclyn! Also, stay tuned for one last weekend post tomorrow. Happy weekend!
 

Artist Spotlight: Thangka painter Nicola Mountney

Today I’m back with a second Artfinder feature showcasing the exquisite paintings of Tuscany-based artist, Nicola Mountney.  Nicola is an expert in Thangka painting, which is Tibetan Buddhist painting on cotton or silk appliqué. She took a rare opportunity to train under a Western Thangka Master and has developed a very special style of painting.  I especially enjoy the depiction of water in Nicola’s paintings, which is really quite stunning and serene.  I recently had the opportunity to interview Nicola and learn more about her unique artform.  I am pleased to bring you art expert Nicola Mountney for today’s Artist Spotlight feature. 
 
 
Whirlpool & Crashing Waves, Nicola Mountney 2014, Gouache & egg tempera on cotton 

Nicola shares about her experience learning Thangka painting…

There are many strict rules and  little artistic freedom in thangka painting.  The drawing side of it is very technical and it takes many years to become accomplished.  I spent hundreds of hours learning to shade using very particular techniques.  You learn to train the eye to spot every single error in your work by repetitive line drawings and paintings.  It’s not for everyone, but it meant a great deal to me.
 
Dancing Cranes, Nicola Mountney 2014, Gouache painting
 

Nicola shares some of her recent works…

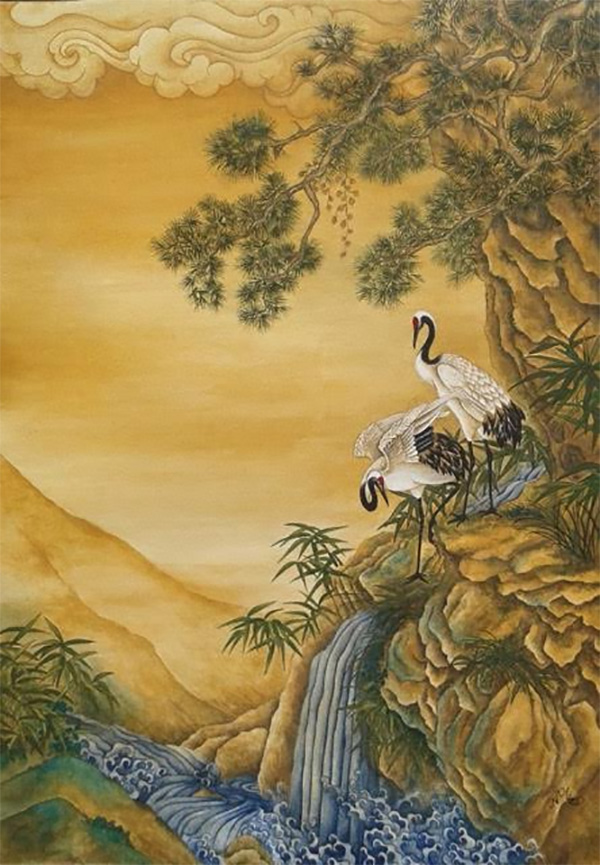
Below are two of my most recent paintings.  I’m particularly pleased with the detail on the tigers and the luminosity and smoothness of the landscape in the crane painting. 
 
The palette I use creates a peaceful, spacious atmosphere, and lends itself well to interior design particularly in contemporary settings.  Once I moved away from the strict guidelines of thangka painting, I initially painted in miniature, but now the paintings have become much larger.  I’m planning several triptychs (3-panel paintings) of landscapes and water.  I also plan to use my work as a basis for textiles.
 
Lounging Tigers 2, Nicola Mountney 2015
Cranes Watching a Waterfall, Nicola Mountney 2015
 

On developing her own unique technique…

I have studied the landscapes of early thangka paintings, and this became the foundation of my earlier paintings, really as result of practising the painting techniques.  I then found that I wanted to develop my own ideas and techniques and became greatly inspired by the Chinese Landscape style, Shang Shui (literal translation; mountain, water landscape).  The blue and green landscapes, a concept developed in Chinese painting from the Tang Dynasty, I feel gives the paintings a jewel like quality.  Water forms a central theme in my work, meandering streams, whirlpools, rock pools and waterfalls.  I find it interesting how this stylised form of painting water, developed centuries ago looks fresh and contemporary today
 
Sea Foam Breaking Over Rocks, Nicola Mountney 2014, Gouache on card 

Nicola’s inspiration and the perfect day…

I live in Tuscany, one of the most beautiful places in the world, so, I am never short of inspiration.  A perfect day is sitting at my desk with paintbrush in hand and a cappuccino, listening to Bach whilst I work.
 

Thank you for sharing your beautiful paintings with Interiors by Jacquin.  We look forward to seeing your artwork in textile form in the future!  That really will be a treat, especially for designers.  To see more of Nicola Mountney’s artwork for purchase, please visit her page on Artfinder.  Nicola’s artwork would be a perfect way to bring a touch of chinoiserie to your home.