If any of you made New Year resolutions to eat healthier in 2016, then this blog post will definitely be a great resource. Microgreens are full of nutrients and great as a salad, in addition to being a fun, indoor gardening project. It’s the perfect activity to try during this cold, winter season. Cassie Johnston of Back to Her Roots, a healthy eating and gardening blog, is showing us just how it’s done. By then end of this post, you’ll be able to grow your own microgreens at home, too.
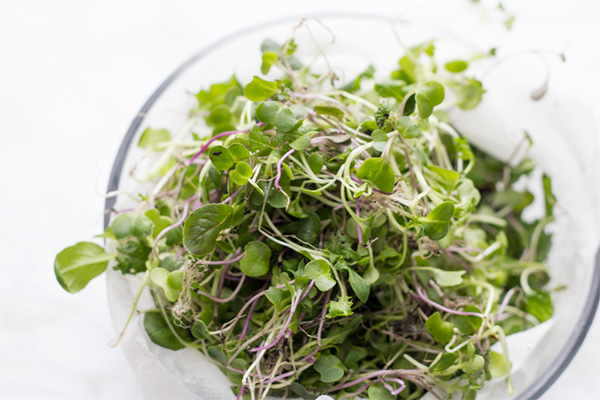
 You might be asking, well what the heck is a microgreen? Well, a microgreen is the new, tender shoot of a vegetable plant. It’s what happens if you let a sprouted seed go a little bit farther into growing, but don’t let it completely mature. These greens are tender, sweet, and insanely good for you they are literally one of the healthiest veggies on the planet! Newly sprouted, tiny microgreens have up to 40 times the nutrient impact as their mature plant counterparts. 40 TIMES! Just a single example: microgreens from red cabbage seeds have 40 times more vitamin E and six times more vitamin C than fully-grown red cabbage. Crazy, right?
Microgreens make an awesome winter substitute for lettuce or other cooking greens—we like microgreen and sprout salads in the winter when our garden isn’t producing. You can also use them on sandwiches, in stir-frys, or in casseroles. And the best part, they are insanely easy to grow indoors. Like, I promise you can do it. Even if you’ve killed stuff before. You can do it!

So, what do you need to get grow your own microgreens? Not much, actually:
-
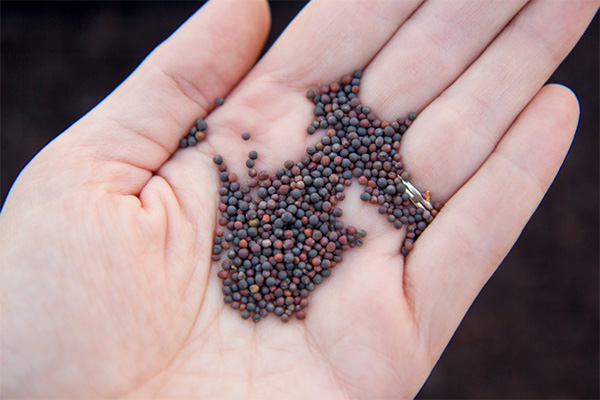
Microgreen Seeds: You can use almost any vegetable seed to grow microgreens (some are tastier than others, though), but a lot of companies offer special microgreen seed mixes that are a great option for first-timers. They have a nice variety of tastes, textures and nutrition. I really like the microgreen mixes from Johnny’s Seeds. If you don’t want to go with a mix, cilantro, kale, radishes, basil, and beets are all great seeds to start with.
-
Soil:
Seed starting medium is your best bet, but honestly, you can grab just about any potting mix or garden soil from the store and have good luck. I’d personally steer clear of soils that have fertilizers mixed in—you don’t want those yucky chemicals in your greens! We make our own seed starting mix, but there are some really nice organic options available at most stores this time of year. I even saw an organic potting mix at my grocery store last week!
-
Tray:
You’ll need something to grow your microgreens in. We use regular seed starting trays—available at most garden centers and hardware stores—but honestly, you can use pretty much anything. These greens aren’t going to stay in them very long, so it doesn’t have to be anything special. A plastic tote or a galvanized tub or heck, even a baking dish!
-
Light Source:
There are two ways of going about this—the natural way or the artificial way. For the natural way, all you need is a sunny window. Easy! Unless you have a cat, like we do, and then they will make that warm tray of soil their bed. So we do our microgreens under a fluorescent light in a cat-proof room. You don’t need any kind of special light or lightbulbs. Just get the cheapest fluorescent shop light you can find (we have this one) and outfit it with two regular fluorescent lightbulbs. They’ll try to tell you you need special full-spectrum light bulbs for your grow lights—at about four times the price—and they might make your greens grow a touch better, but not enough to warrant the price in my opinion. Hang the light about four inches above the table where you’ll set your tray.
-
Water:
Duh. I recommend using a spray bottle for microgreens.


If you’re trying to start your seeds in a particularly cool place, you might want to think about either cranking the heat for a few days while the seeds germinate, or use a seed starting mat. You can get seed starting mats from gardener’s supply stores for beaucoup dollars, or you can do what we do, and just use an old electric blanket under the tray. A heating pad works, too!

A few days later, you’ll see even more seed germinating, and then the true leaves starting to show. These are the ones that actually start looking like the plants you are used to, albeit really tiny, adorable
versions.