Get Your Photos Onto Your Wall with Creativity!

Image via Death to the Stock Photo

Hi! I’m Tiffany Josephs, friend of Jacquin’s and Portrait & Event Photographer for Creative Entrepreneurs, based out of Fredericksburg, VA.  I love photography, but more importantly I believe images should be seen on a regular basis, in print, in your home, for everyone to cherish and reminisce on.  

As a mother of three kids under five, (1) five year old and (2) four year olds to be exact, they really do grow extremely fast! It’s nice to see their faces when they flip through a book filled with images of them in diapers or portraits of them making funny faces hanging on our walls.  My hope is that when they get older, they will be able to remember their innocence and how much fun they had stressing out
mommy. 😉  

So, today I’m going to show you two creative ways to get those special  memories out of your iPhone and onto your walls, for a touch of fun & personalized photo-décor!

 
Images via Woodific

1. Have your photos printed on wood panels!

Let’s start with having your special images printed on wood!!!  YES, I said wood!  Woodific company will print your photos on 1/2’’ thick, handpicked and highest quality plywood, uploaded directly from Instagram or from your computer in 3 ideal sizes to choose from: 5’’x5’, 8’’x8’’, and 11’’x11’’.  
 

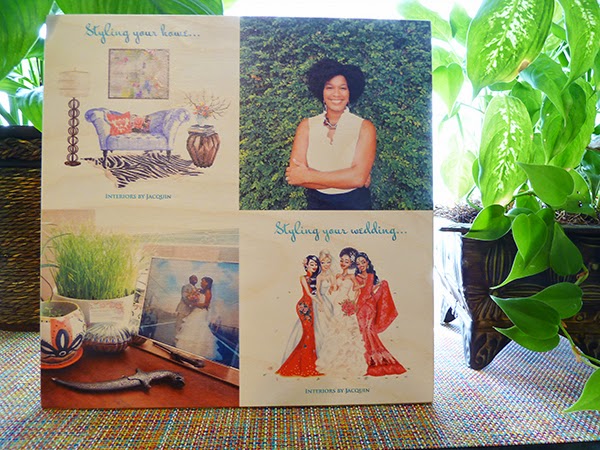
Jacquin created a wood panel collage with images that represented Interiors by Jacquin | Image via Jacquin Milhouse-Headen

Woodific uses thick, handpicked wood for its photo panels (as shown above) and they are easily mounted to your wall! | Image via Tiffany Josephs Photography

Jacquin and I decided to give Woodific a try and we were both very pleased!  Their website is user friendly and their processing and shipping was super fast.  I was equally impressed with the actual product itself!  The images printed nicely and came with mounting nails so that I could hang them immediately.  #winning 
 

Wood panel photo of photographer Tiffany Josephs with husband Eric Josephs | Image via Tiffany Josephs Photography

Wood panel collage created with Jacquin’s photos from her trip to Namibia, Africa | Image via Jacquin Milhouse-Headen

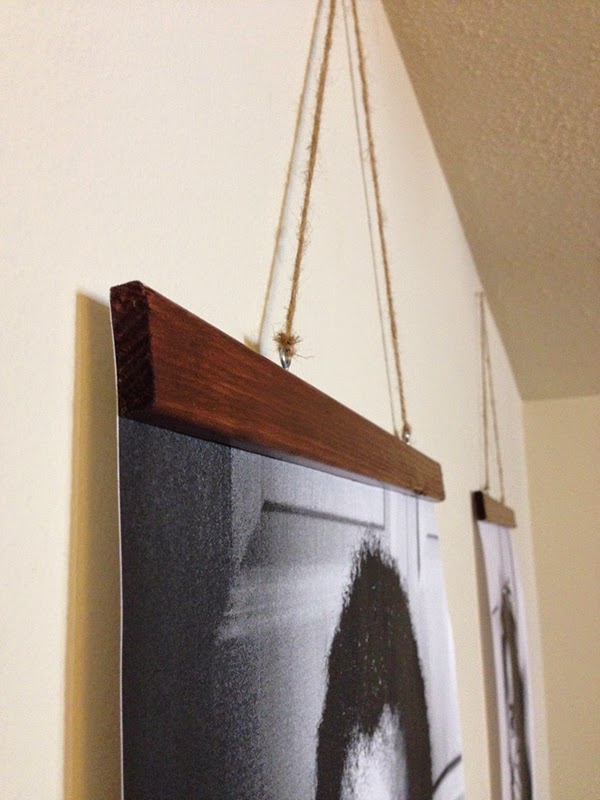
2. Try this unique & oversized engineer print idea for your photos!  It’s do-it-yourself!

 
My second photo décor recommendation is a do-it-yourself project.  I know what you’re thinking, I love decorating and I love DIY projects, but REALLY, who has time for all of that??  Well, custom framing doesn’t get any easier (or cost effective) than this! 
 
I have three amazing little ones at home and we thought it would be fun to recreate an image I snapped  quickly while waiting at the doctor’s office recently.  But with this, I wanted to print something really large to put on one of our main walls.  I found this clever idea via Chris Loves Julia blog to make prints using engineering paper.  It turned out that while following the tips from my great source I ran into a few problems, like Staples apparently no longer prints images on engineer paper and you must pay for regular enlargements on photo paper.  Nope. I didn’t like that at all.  Luckily, good ol’ Kinko’s made life super easy for me and printed out 24×48 prints on engineer paper (aka “engineer prints”) within minutes, all under $10.  


Engineer prints of Tiffany Joseph’s adorable children made with DIY frames – Love these! | Image via Tiffany Josephs Photography

While doing more research on Pinterest I came across this AMAZING idea for the frame via 4 Men 1 Lady blog. Originally I was going to go with the Ikea frames suggested in Chris Loves Julia’s blog post (love!), but THIS DIY frame was so my style and worth the little bit of time it took to get the materials and put them together.  It only requires: twine, wood glue, screw hooks, poster board, a small amount of window trim from the hardware store, and wipe-on wood finishing cloths to stain the wood creating a truly original look.  You’ll definitely want to try this photo décor DIY! It’s so easy and so unique!
 

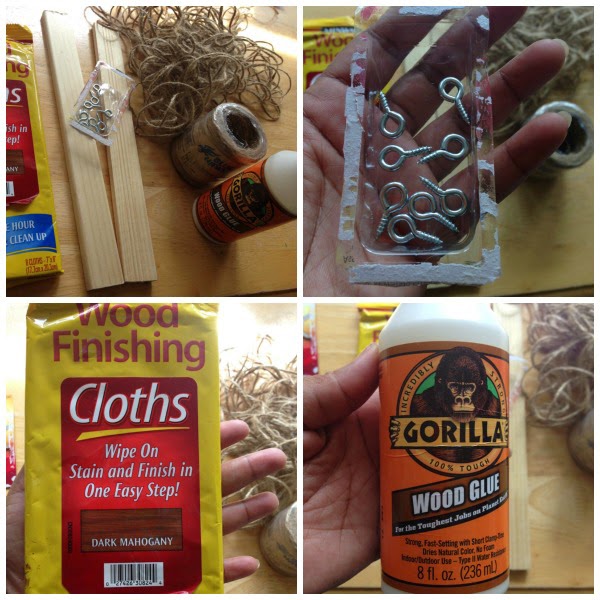
Materials for this do-it-yourself engineer print project.  It’s so simple! | Image via Tiffany Josephs Photography

Instructions:

  • (1) Have your engineer prints printed at Kinkos.
  • (2) Cut your poster board to the size of your print and adhere.
  • (3) Cut your window trim to size (you’ll need 2 pieces of window trim).
  • (4) Stain the wood a shade of your choice.  Allow to dry.
  • (5) Glue window trim to the front of your engineer print.  Glue one piece of trim to the top and one piece of trim to the bottom. 
  • (6) Screw in hooks and attach your twine for the length you desire.
  • (7) Hang on your wall and enjoy!

To sum it all up, both projects are absolutely awesome!  I must admit there is something very authentic about creating your own masterpiece. 😉  So go get those photos off of your cameras and cell phones and onto your home’s walls! Find out more about me and my Hundred Dollar Headshot Session over at www.TiffanyJosephs.net or follow me on Instagram here.  


Author: InteriorsbyJacquin